Contrary to popular belief, raw strength from the gym often fails to translate to real life; the key isn’t lifting heavier, but training your body to intelligently control and stabilize movement.
- Traditional training on machines creates « artificial strength » in one direction, leaving you unprepared for the awkward, multi-directional loads of daily life (like carrying groceries or a child).
- True functional power comes from building core « stiffness » to resist rotation and training movement patterns (like hinging and carrying), not isolated muscles.
Recommendation: Shift your focus from muscle-building exercises to movement-based training like loaded carries and anti-rotation drills to build strength that makes everyday tasks feel safer and easier.
You can bench press your bodyweight and leg press a small car, but you still feel a twinge in your lower back when lifting a bag of groceries out of the trunk. You have the stamina for an hour on the elliptical, yet you’re winded after carrying your toddler up a flight of stairs. Sound familiar? This frustrating gap between « gym strength » and « real-world capability » is incredibly common. It stems from a fundamental misunderstanding of what useful strength really is. Most of us spend our time training muscles in isolation, moving heavy weights along fixed, predictable paths.
Life, however, is anything but predictable. It’s a chaotic dance of asymmetrical loads, sudden twists, and awkward angles. The solution isn’t more time at the gym doing the same old routine. It’s about a smarter approach: functional resistance training. This isn’t about fancy exercises; it’s a paradigm shift. Instead of focusing on how much you can lift, you focus on how well your body can coordinate to control a load. The secret lies in training movement patterns, not just muscles, and building a core that can act as a rigid, protective brace against the rotational forces that cause injury.
This guide will deconstruct why your current routine might be failing you and provide a clear roadmap to building strength that actually shows up in your daily life. We will explore how to train for the demands of moving furniture, bulletproof your spine against injury, and even turn your office chair into a core-training tool. It’s time to build a body that’s not just strong in the gym, but resilient, capable, and effortless in the real world.
To help you navigate this practical approach, we’ve structured this guide to address the most common disconnects between traditional exercise and functional fitness. Explore the sections below to rebuild your understanding of true, usable strength.
Summary: A Practical Guide to Functional Strength for Everyday Life
- Why Your Leg Press Strength Doesn’t Help You Climb Stairs?
- How to Perform the Farmer’s Carry to Fix Your Posture Instantly?
- Dumbbells vs. Machines: Which Prepares You Better for Moving Furniture?
- The Isolation Mistake That Leads to Lower Back Injuries in Real Life
- Which 3 Anti-Rotation Exercises Will Bulletproof Your Spine?
- Why Your Bench Press Is Ruining Your Shoulder Mobility for Golf?
- How to Adjust Your Office Chair to Engage Your Core Automatically?
- How to Build Strength That Actually Improves Your Mobility After 40?
Why Your Leg Press Strength Doesn’t Help You Climb Stairs?
The leg press machine is a perfect symbol of the gym-to-life disconnect. You can load it with hundreds of pounds, push, and feel immensely powerful. Yet, that strength seems to vanish when you face a simple flight of stairs with a laundry basket. The reason is a concept called proprioception—your body’s internal GPS. It’s the constant, subconscious communication between your brain, joints, and muscles that allows you to balance, coordinate, and navigate your environment. Climbing stairs requires your body to stabilize on one leg, sense the position of your joints, and activate dozens of small muscles to maintain balance—a massive proprioceptive challenge.
The leg press machine systematically eliminates this. Your back is supported, your feet are on a fixed platform, and you are pushing in a single, unvarying plane of motion. You are training your leg muscles in a sterile environment, completely divorced from the skills of balance and coordination. This creates a neuromuscular disconnect: your muscles are strong, but your nervous system has no idea how to use that strength in a complex, real-world movement pattern. In essence, you’ve built a powerful engine but have no steering wheel.
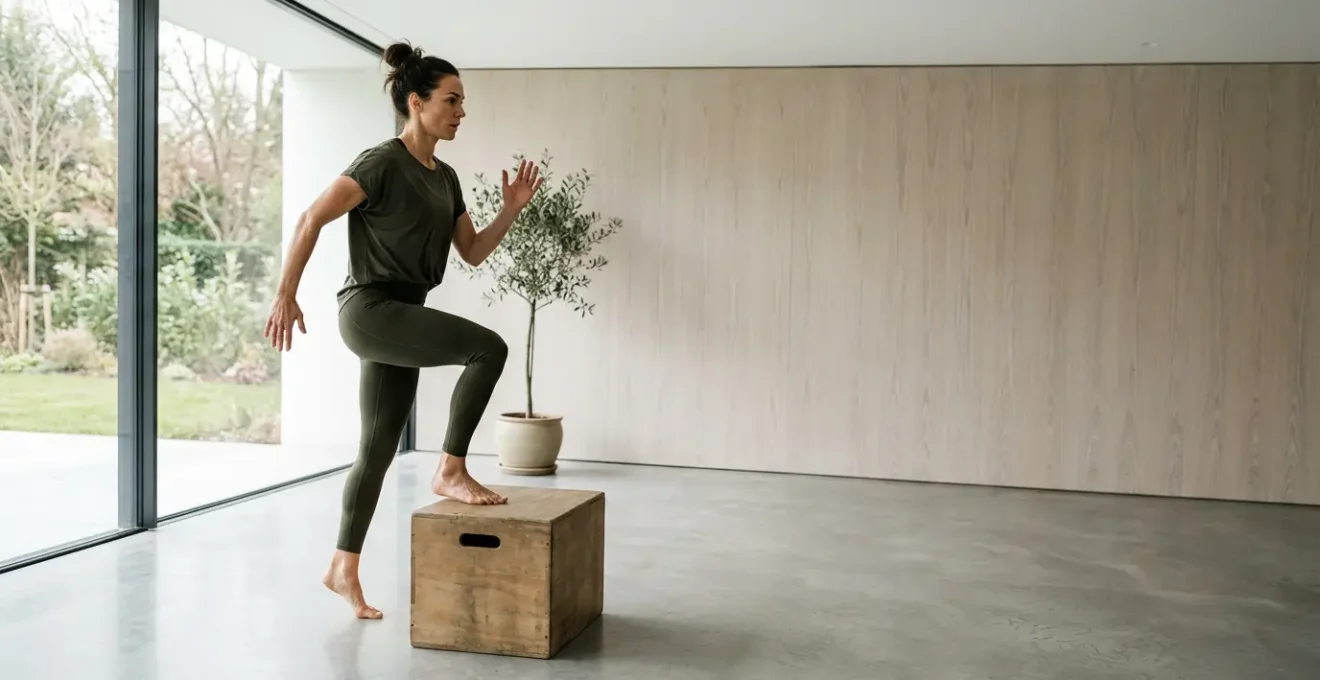
Functional training bridges this gap by re-introducing instability and multi-planar movement. Exercises like lunges, step-ups, and single-leg deadlifts force your body’s GPS to turn back on. The results are not just about strength but about improved control. In fact, specific research on proprioceptive training shows a 14.66% improvement in gait and 11.47% improvement in balance, skills that are directly applicable to climbing stairs effortlessly and reducing your risk of falls.
How to Perform the Farmer’s Carry to Fix Your Posture Instantly?
If there’s one exercise that embodies functional strength, it’s the Farmer’s Carry. It’s brutally simple: pick up heavy things and walk. This single movement is a masterclass in building the kind of strength that matters for daily life, from carrying groceries to moving luggage. Its primary benefit is teaching your body to create and maintain total-body tension under load, which has an immediate and powerful effect on your posture. When you hold heavy weights at your sides, every muscle from your grip to your upper back and core must fire in unison to keep you upright and stable.
The exercise forces you to pull your shoulders back and down, engaging your lats to create a stable « shelf » for your shoulder girdle. It compels you to brace your core, creating intra-abdominal pressure that supports and protects your spine. As you walk, your body fights the micro-oscillations of the weights, training your obliques and deep stabilizers to resist lateral bending. It is, quite literally, a walking plank. This is why you often feel « taller » and more aligned immediately after a set; you’ve just given your postural muscles an intense and highly specific workout.
Here’s how to perform it correctly to activate your entire postural chain:
- Step 1: Select weights that challenge your grip. For beginners, a good starting point is approximately 40-50% of your bodyweight per hand (e.g., 20kg per hand for an 80kg person).
- Step 2: Stand tall with the dumbbells or kettlebells at your sides. Pull your shoulders back and down, feeling your lat muscles engage under your armpits.
- Step 3: Brace your core as if you’re about to be punched in the stomach. This creates the crucial intra-abdominal pressure.
- Step 4: Walk forward with controlled, deliberate steps. Keep your torso upright and your shoulders level. Do not let the weights pull you forward.
- Step 5: Keep your chest « proud » and your gaze forward. The moment your grip or your posture begins to fail is when the set ends.
- Step 6: Aim for 3-4 sets of carries over a distance of 30-50 meters, resting for 90 seconds between each set to allow your grip to recover.
Dumbbells vs. Machines: Which Prepares You Better for Moving Furniture?
Imagine moving a heavy armchair. It’s awkward, unbalanced, and you have to pivot and shift your weight constantly. Now, which gym exercise better prepares you for that: a seated chest press machine or a single-arm dumbbell press? The answer reveals the core difference between machine-based training and functional free-weight training. Machines guide you through a fixed, single plane of motion. They provide all the stability, so your smaller, crucial stabilizer muscles don’t have to work. This is great for safely isolating a large muscle group but terrible for preparing you for the chaos of real life.
Free weights, like dumbbells and kettlebells, force your body to manage instability. They demand that you control the weight in three-dimensional space, just like that armchair. This activates not only the primary moving muscles but also the entire network of stabilizers around your joints and in your core. You are training your body as an integrated system, building both strength and the motor control to apply it. Handling an asymmetrical load—like carrying a single heavy dumbbell (a « suitcase carry »)—is one of the most direct ways to train for the reality of carrying a grocery bag, a briefcase, or a child on one hip.
While machines have their place, especially for beginners or rehabilitation, over-reliance on them builds a fragile, « one-dimensional » strength. The following table, based on principles highlighted by sources like Live Science’s analysis of functional training, breaks down the key differences:
| Training Characteristic | Free Weights (Dumbbells) | Machines |
|---|---|---|
| Planes of Motion | 3D movement in all directions | Fixed, single plane only |
| Stabilizer Activation | High – constant balance required | Minimal – machine provides stability |
| Reactive Strength Training | Yes – adapts to load shifts | No – predictable resistance path |
| Asymmetrical Load Handling | Excellent (suitcase carries, single-arm work) | Poor – bilateral symmetry enforced |
| Furniture Moving Simulation | Direct carryover to awkward objects | Limited functional transfer |
| Beginner Safety | Moderate – requires coaching | High – guided movement pattern |
The Isolation Mistake That Leads to Lower Back Injuries in Real Life
Many people with lower back pain are told to « strengthen their back » and turn to exercises like back extensions or « supermans » on the floor. This is a classic isolation mistake. It focuses on strengthening a muscle without considering the movement pattern it’s part of. The most critical pattern for protecting your lower back is the hip hinge—the ability to bend at the hips while keeping a neutral, stable spine. This is how you should lift a box, pick up a child, or even bend to tie your shoes. Isolation exercises often do the opposite; they encourage movement and extension *from the lower back itself*, reinforcing a dangerous pattern.
Dr. Stuart McGill, a leading spine biomechanics expert, has extensively researched this topic. His findings are a stark warning against the isolation approach. As he notes in his work at the University of Waterloo, this type of training can be directly counterproductive. This perspective is critical for understanding functional safety:
Isolation machines train a squat pattern or no pattern at all, actively de-training the crucial hip hinge pattern needed for nearly every real-world lifting task.
– Dr. Stuart McGill, University of Waterloo spine biomechanics research
Worse, some common isolation exercises can subject the spine to dangerous levels of force, paradoxically increasing injury risk while providing little functional benefit. This is not just theory; it’s backed by direct measurement.
Case Study: The Hidden Dangers of the « Superman » Exercise
Research by Dr. Stuart McGill measured the forces on the spine during popular exercises. The analysis revealed that the « superman » exercise, often recommended for back strengthening, generated approximately 6,000 Newtons of spinal compression. This is nearly double the 3,300 Newton safety limit recommended by the National Institute for Occupational Safety and Health for lifting tasks. In stark contrast, a functional exercise like the bird-dog, which trains core stability and the hip hinge pattern, produced only 2,000 Newtons of force while activating more crucial stabilizer muscles. This demonstrates how a well-intentioned isolation exercise can be far more dangerous than a properly executed functional movement.
Which 3 Anti-Rotation Exercises Will Bulletproof Your Spine?
If the hip hinge is the primary pattern for safe lifting, then rotational stiffness is the superpower that protects your spine during all of life’s unpredictable moments. It’s your core’s ability to act as an « emergency brake, » preventing your torso from twisting under load. This skill is far more important than the ability to do thousands of crunches. When you slip on a patch of ice or lift an unbalanced object, it’s your core’s anti-rotation strength that prevents a simple mishap from becoming a debilitating back injury. Building this « stiffness » is the essence of bulletproofing your spine.
Training for this involves exercises where the primary goal is to *resist* movement, not create it. These anti-rotation drills teach your deep core muscles, like the transverse abdominis and obliques, to fire automatically and create a rigid, stable cylinder around your lumbar spine. Incorporating this type of neuromuscular training is proven to have a dramatic effect on injury prevention. In athletic populations, studies on programs that include balance and core control show up to a 50-51% decrease in ACL injury rates, demonstrating how core stability protects the entire kinetic chain.
Here are three of the most effective anti-rotation exercises to add to your routine:
- Pallof Press: Stand perpendicular to a cable machine with the handle at chest height. Grasp the handle with both hands at your sternum and step away to create tension. Brace your core and press your arms straight out in front of you, fighting the cable’s pull to twist you. Hold for 3 seconds, then slowly return. Perform 3 sets of 8-10 reps per side.
- Renegade Row: Assume a plank position with your hands on two dumbbells. Keeping your hips perfectly square to the ground, row one dumbbell up to your ribcage. The challenge is to prevent your torso from rotating. Lower the weight with control and alternate sides. Perform 3 sets of 6-8 reps per arm.
- Cable Wood Chop (with Eccentric Focus): Attach a handle to a high pulley. Stand sideways to the machine and grasp the handle with both hands. Pull the cable diagonally across your body from high to low. The most important part is the return: control the deceleration, taking a full 3 seconds to let the handle return to the start. This trains your ability to safely absorb rotational force. Perform 3 sets of 10-12 reps per side.
Your Anti-Rotation Audit: Key Points to Check in Your Routine
- Identify Movements: List all exercises in your current program. Categorize them as pushing, pulling, squatting, or hinging.
- Assess Stability Demands: For each exercise, ask: « Does this challenge my ability to keep my hips and shoulders square? » (e.g., a single-arm dumbbell press vs. a machine press).
- Check for Asymmetry: Inventory how many exercises are bilateral (both limbs doing the same thing) versus unilateral (single-limb) or asymmetrical (loaded carries). Aim for at least 30% unilateral/asymmetrical work.
- Spot the Gaps: Does your routine include any direct anti-rotation work like Pallof presses or anti-extension work like dead bugs? If not, this is a major gap.
- Create an Integration Plan: Replace one isolation exercise (like crunches or back extensions) with one of the anti-rotation exercises listed above. Start there and build.
Why Your Bench Press Is Ruining Your Shoulder Mobility for Golf?
The bench press is the king of upper-body gym exercises, but for many real-world activities, it can be a silent saboteur of shoulder health and performance. The issue lies in what the exercise teaches your shoulder blades (scapulae). To lift heavy weight safely on a bench, you are coached to pin your shoulder blades down and back, creating a rigid platform. This is great for stability in that specific lift, but it’s the exact opposite of what your shoulder needs to do in dynamic activities like throwing a ball, swimming, or swinging a golf club.
As functional movement literature points out, the demands are fundamentally different:
The bench press teaches you to pin your shoulder blades down and back for stability, but a golf swing requires the scapula to move freely around the ribcage.
– Physical therapy and biomechanics research, Functional movement assessment literature
A healthy, functional shoulder relies on « scapulohumeral rhythm, » the coordinated movement of the arm bone and the shoulder blade. For every three degrees your arm raises, your scapula should rotate upward one degree. By repeatedly training your body to lock down the scapula, you are effectively « gluing » it to your ribcage. This forces the small, delicate rotator cuff muscles and the shoulder joint itself to take on more work than they are designed for, leading to impingement, reduced mobility, and chronic pain. For a golfer, this means a shorter, less powerful backswing and an increased risk of injury.
The solution is not to abandon pressing movements, but to choose variations that allow for natural scapular movement. Exercises like push-ups (where the scapulae can move freely), landmine presses, and single-arm dumbbell presses encourage the shoulder blade to glide, rotate, and stabilize dynamically. This builds strength *through* a full range of motion, creating shoulders that are not only strong but also mobile and resilient for the demands of sport and life.
How to Adjust Your Office Chair to Engage Your Core Automatically?
We spend a huge portion of our lives sitting, often in « ergonomic » chairs that encourage passive slouching. These chairs, with their high backs and plush armrests, are designed to take all the load off your postural muscles. While comfortable in the short term, they teach your core to be lazy. However, with a few counter-intuitive adjustments, you can transform your workstation into a low-level, all-day core training environment. The goal is to create just enough instability to force your deep stabilizing muscles to wake up and do their job.
This isn’t about sitting on a wobbly stability ball all day, which can lead to fatigue and poor posture. It’s about making subtle changes to your existing chair to encourage active sitting. This means using your own musculature to hold an upright, neutral posture rather than relying on the chair for support. By doing so, you provide a constant, low-grade stimulus to your transverse abdominis, obliques, and spinal erectors, building endurance in the very muscles that protect your back and support good posture throughout the day.
Here are three simple adjustments to turn your chair from a passive recliner into an active training tool:
- Adjustment 1: Lower the Seat. Adjust the seat height so your hips are slightly *below* your knees, while keeping your feet flat on the floor. This « sub-optimal » position makes it harder to slouch and forces your core to make continuous micro-adjustments to maintain an upright torso.
- Adjustment 2: Remove the Armrests. Armrests allow you to offload your upper body weight and let your shoulders slump forward. By removing them entirely, your lats and rhomboids (upper back muscles) must engage isometrically to support the weight of your arms, which naturally helps pull your shoulders back and activate your postural chain.
- Adjustment 3: Use Only the Front of the Seat. Actively avoid leaning against the backrest. Sit on the front two-thirds of the seat pan. This forces you to balance on your « sit bones » (ischial tuberosities), which automatically engages your deep core muscles and encourages a natural, neutral curve in your lower back.
- Bonus Tip: For an added challenge, alternate between this active setup and sitting on a stability disc or balance cushion for 20-30 minute intervals. This prevents muscular fatigue while building postural endurance over time.
Key Takeaways
- True strength is systemic; it’s about how well your muscles and nervous system work together to control movement, not just how much weight a single muscle can move.
- The most important function of your core is to prevent unwanted motion. Training anti-rotation is more critical for back health than performing crunches.
- To prepare for life’s unpredictable loads, prioritize free weights and unilateral (single-sided) exercises over stable, bilateral machine work.
How to Build Strength That Actually Improves Your Mobility After 40?
As we move past 40, a common fear is that building strength will lead to stiffness and a loss of mobility. We see bodybuilders who can’t touch their toes and assume that strength and flexibility are mutually exclusive. For many traditional training methods, this is true. However, a functional approach reveals that you can, and should, build strength and improve mobility simultaneously. The key is to focus on eccentric training—the « lowering » or « yielding » phase of an exercise.
Most people focus on the concentric phase (the lifting), but controlling the descent is where the magic happens for mobility. When you perform a slow, controlled eccentric, you are actively strengthening your muscles in a lengthened position. Think about the bottom of a Romanian Deadlift or a Bulgarian Split Squat. By building strength and control in these end-range positions, you are essentially teaching your nervous system that this range of motion is safe and strong. This « unlocks » flexibility by reducing the protective muscle guarding that often causes feelings of tightness.
This isn’t just a theory; it’s a highly effective strategy backed by recent science, making it a superior method for adults looking to combat age-related stiffness while getting stronger.
The Dual-Benefit of Eccentric Training for Adults Over 40
A comprehensive 2024 meta-analysis on resistance training in older adults investigated the effects of different training styles. The findings were clear: programs emphasizing the eccentric phase of movements not only produced significant strength gains but also led to measurable improvements in flexibility and joint mobility. The study concluded that because eccentric-focused exercises build strength in lengthened muscle positions, they are uniquely effective at countering age-related stiffness. This makes them a more efficient and effective protocol than concentric-only training for the over-40 population seeking both strength and mobility.
Furthermore, this type of resistance training is the single most effective tool against age-related decline in muscle mass (sarcopenia) and bone density. A broad meta-analysis confirms that consistent strength training is a powerful intervention, effectively reducing neuromuscular aging while increasing muscle mass and bone density. By choosing exercises that load movement patterns through a full range of motion and emphasizing the eccentric phase, you build a body that is not only stronger but also more supple and resilient for years to come.
By shifting your focus from isolated muscles to integrated movement patterns, and from creating motion to resisting it, you build a foundation of strength that is truly useful. This is the path to making daily chores feel effortless, protecting your body from injury, and maintaining a high quality of life for decades. Your journey to functional strength starts not with adding more weight to the bar, but by changing the way you think about movement itself. Start today by auditing your routine and replacing one isolation exercise with a functional, multi-joint movement.